One of the most important aspects of ManaCube's Survival realm is its party system, which comprises various features. This article is your one-stop shop for learning how you can effectively manage and get the most out of each party feature.
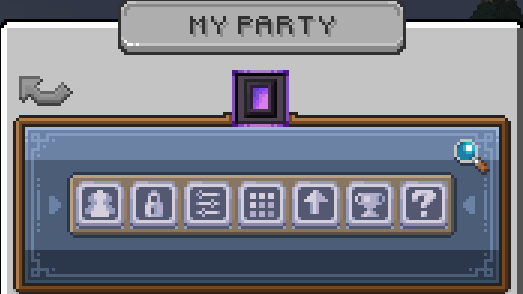
After creating your party with /p create <party name>, you can use /party (or /p) to access the Party Manager interface. From permissions to claims and settings, the Party Manager interface serves as a clear and functioning home base for the diverse set of party features that Survival has to offer.
¶ Primary Features
For the sake of this Wiki article, Primary Features are party features found directly on the Party Manager interface. These are core features that will likely be used often throughout your gameplay.
¶ Party Status
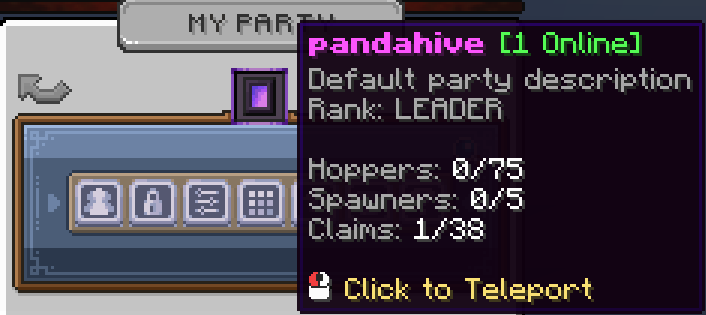
Hovering your cursor over the Nether Portal icon in the Party Manager interface displays an overview of general information about you and your party. This includes your party role, the party's name and description, online members, and its current hopper, spawner and claim limits.
You can also click on this icon to teleport to your party home. If you have not set your party home, you will be teleported to the oldest chunk you claimed.
NOTE: Use
/p sethomeanywhere on your party's territory to set its home at that location. For more information on commands, see the Player Commands article.
¶ Members
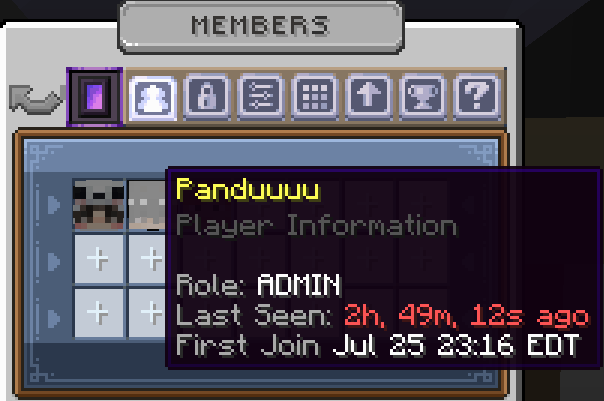
You can click on the "Members" button in the Party Manager interface (or use /p member) to display an interface that lists all the members in your party. As shown in the image below, this list is presented in a grid format, with each party member having a representative icon. Additionally, empty slots in the grid are marked with a "+" sign, which you can click to invite players to the party.
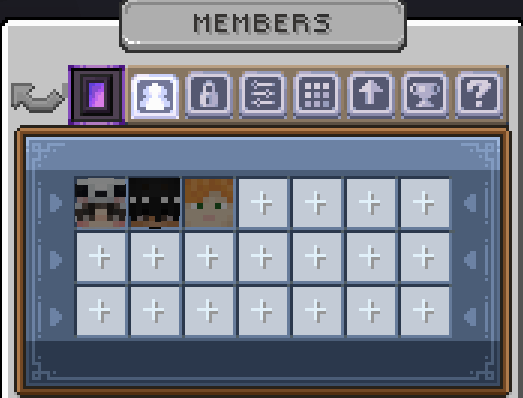
In this interface, hovering your cursor over a member's face displays information about them, including their username, party role, the last time they were online and their first join date.
TIP: All parties have a starting party member limit of 27. One way to increase this limit is by completing your Party Quests (
/pquests). For more information on quests, see the Quests article.
¶ Roles and Permissions
Clicking the "Permissions" button (or using /p perms) will take you to an interface where you can assign and deny permissions to your party roles. At the top of the interface, there are five crowns representing different party roles. These crowns allow you to select which role's permissions you wish to edit, and they are listed from left to right as follows:
- Visitor: Visiting guests in your party.
- Co-Op: Trusted players from other parties.
- Member: Members of your party.
- Mod: Moderators of your party.
- Admin: Highest ranking party members.
¶ Visitor, Member, Mod and Admin
By default, all party members will have the "Member" role, and all non-party members, excluding those who are co-oped, will have the "Visitor" role.
You can change a party member's role between "Member", "Mod" and "Admin" using the command /p setrole <username> <party role>.
¶ Co-op
The "Co-Op" role can be assigned to players who are not in your party but still need specific party-wide permissions. For example, you might give this role to a friend from another party to help with your building projects without making them a full member. Players with this role will have "Co-Op" permissions across your entire party.
NOTE: Use
/p coop <add/remove> <username>to assign or revoke the "Co-Op" party role to or from a specific player.
¶ Assigning Permissions to Party Roles
Below the crowns in the "Permissions" interface, there is a grid of icons representing various permissions that can be assigned to each party role. To edit the permissions for a specific role, you need to click on its corresponding crown first. By adjusting these permissions, you can customize what actions each role can perform within the party.
The permissions you can manage are:
 Invite Members: Permission to invite others to the party (
/p invite <username>). Kicking Members: Permission to kick others from the party if assigned to a lower party role (
/p kick <username>). Ban Players: Permission to ban players from the party (
/p ban <username>). Lock Party: Permission to lock the party, preventing non-party members from entering its territory (
/p lock). Damage Mobs: Permission to damage mobs within the party's territory.
 Set Title: Permission to set titles that are displayed next to members' names in party chat and
 /p info <username/party name>(/p settitle <username> <title>). Block Break: The ability to break blpcks inside territory.
 Block Place: Permission to break and place blocks within the party's territory.
 Claim Land: Permission to claim and unclaim land (
/p claim,/p unclaim, Gold Shovel). Open Vault: The ability to open your parties vault ('/p vault')
 Bank Deposit: Permission to deposit money into the party's bank (
/p bank deposit <amount of money>). Bank Withdraw: Permission to withdraw money from the party's bank (
/p bank withdraw <amount of money>). Manage Warps: Permission to set and delete public warp points (
/p setwarp <warp name>and/p delwarp <warp name>, respectively). Flight: Permission to fly within the party's territory, given the player has flight time or unlimited flight (
/fly). Claim Party Quest Rewards: The ability to claim rewards from /quests.
 Break Spawners: The ability to break spawners inside territory.
 Interact: The ability to interact with buttons, levers, etc.
 Interact Containers: Permission to open containers such as chests, barrels and shulker boxes.
 Interact Trap Doors: The ability to open Trapdoors.
 Interact Fence Gates: The ability to open Fence Gates.
 Interact Pressure Plates: The ability to activate Pressure Plates.
 Interact Buttons: The ability to click Buttons.
 Interact Levers: The ability to flip Levers.
 Interact Doors: Permission to open and close doors.
 Build Other: The ability to break & place entities that aren't covered by other permissions inside territory.
NOTE: Left-clicking an option grants the permission to all players with that role, whereas right-clicking an option denies the permission to all players with that role.
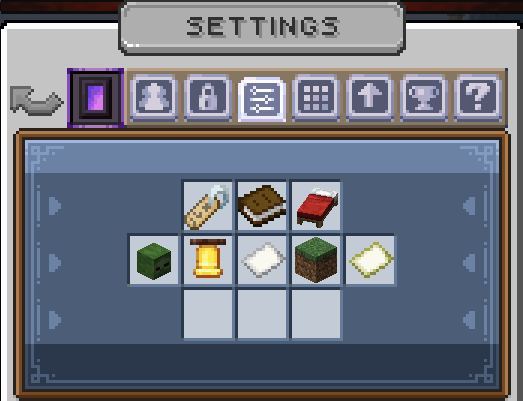
¶ Party Settings
The "Settings" button will take you to an interface where you can customize and manage various aspects of your party. From changing the party's name to setting its home, this interface provides all the essential tools to personalise your party and territory. The options available in this interface are as follows:
- Party Name: Click to change your party's name (or use
/p changename <new name>). To change your party's name, however, you will need a party name change token, which is sold in the/cubitshopunder "Misc".  Party Info: Click to set a description for your party (or use
 /p setdesc <description>). Home Location: Click to set your party's home location (or use
 /p sethome). Browser Icon Texture: Click to set a custom head texture to represent your party in
 /p browse. Notifications: Click to enable or disable party notifications.
 Party Logs: Click to select from and view a variety of activity logs within your party (or use
 /p logs).- Party Claims: Click to view a list of claimed chunks that your party owns (or use
/p claims). This list will provide detailed information about each chunk currently claimed by your party, including their coordinates, who claimed them and when they were claimed.  Territory Map: Click to view a territory map of surrounding chunks (or use
 /p map). This map will display all chunks within a fixed radius of the one you are currently in, and you can even use it to claim and unclaim chunks.
¶ Party Upgrades
Clicking on the "Upgrades" button will take you to an interface where you can use Mana to upgrade several aspects of your party. The upgrades available in this interface are as follows:
 Crop Growth: Increase the growth speed of crops on your territory.
- Max Spawners: Increase the allowed amount of spawner stacks on your territory.
 Max Hoppers: Increase the allowed amount of hoppers on your territory.
 Mob Loot: Increase the amount of loot dropped by mobs on your territory.
 Mob XP: Increase the amount of XP dropped by mobs on your territory.
- Mob Spawning: Increase the spawning speed of all spawners on your territory.
 Crop Harvest: Increase the amount of loot harvested from crops in your claims.
 Redstone Capacity Upgrade: Increase the maximum capacity of redstone in your claims.
Redstone Capacity is the amount of power a component uses whilst turned on or ticking. If it is not powered it will not use any capacity.
Redstone in your claims will be halted if you breach your maximum capacity.
Use/p infoto view your party's usage.- Size Expansion: Complete party quests (
/pquests) to increase your party's maximum chunk claim limit.

NOTE: Excluding "Size Expansion", all party upgrades require your party to be at a certain level. Refer to the Party Upgrades article for a more detailed breakdown of each party upgrade.
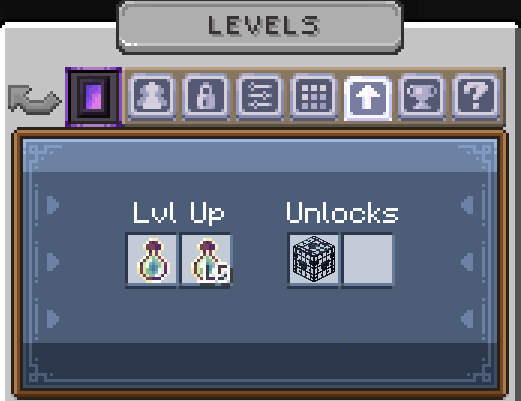
¶ Party Level
The "Party Level" button will take you to an interface where you can level up your party and view what spawners can be placed on its territory upon reaching specific level milestones. Moreover, increasing your party level grants you access to better party upgrades and is a requirement for /prestige. If you wish to level up your party, you can click on the enchanting bottles in the interface below or use /p level <amount of levels>.
If your party is below level 100, you will be kicked from it after 60 days of inactivity. For parties above level 100, this inactivity period extends to 90 days. If you are removed from the party due to inactivity and it still has active members, the highest-ranking member in terms of party role hierarchy will become the leader. However, if there are no members to succeed you, the party will disband.
¶ Spawner Unlocks and Party Level Costs
As mentioned above, your party must reach specific level milestones before certain spawners can be placed on its territory. The level requirements for all spawners are as follows:
Level 1: Pig, Zombie, Spider
Level 10: Skeleton, Chicken
Level 25: Creeper, Sheep
Level 50: Enderman
Level 70: Cow
Level 90: Blaze
Level 150: Iron Golem
Party level costs are linear and can be calculated using the formula: $10,000 x (current party level). For every party level you gain, the cost to upgrade to the next level increases by $10,000 multiplied by your current level. For example, if your party level is 11, you will need to pay $110,000 to upgrade to level 12.
Moreover, once you reach level 100, the cost formula changes to $100,000 x (current party level). For example, if your party level is 101, you will need to pay $10,100,000 to upgrade to level 102.
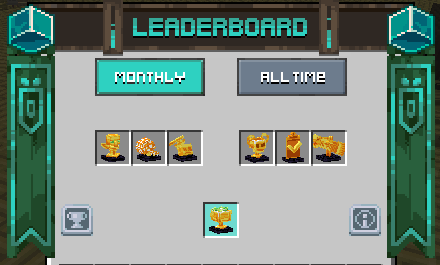
¶ Leaderboards
Click the "Leaderboards" button or use /leaderboard to view the Survival Leaderboard. See the Survival Stats article for more information on this feature.
¶ Help
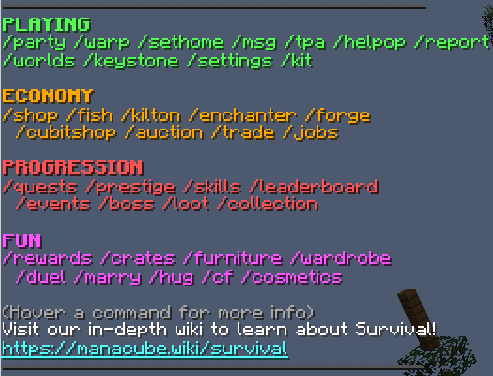
The "Help" button in the Party Manager interface will run the /help command when clicked, displaying an assortment of commands in chat that are classified under the following categories:
- Playing
- Economy
- Progression
- Fun
You can hover over each command with your cursor to see what they do. You will also find a link to the ManaCube Wiki at the bottom, which is where you are right now! In addition to the Wiki, /help is a good way to learn about the basics of Survival.
TIP: For more guidance on getting started in Survival, see the Getting Started article.
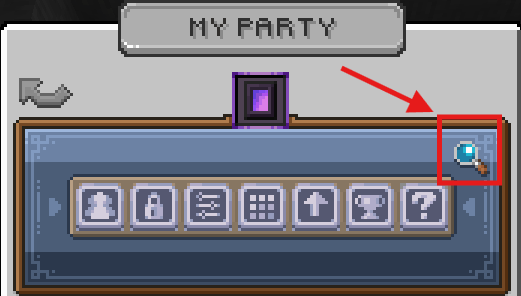
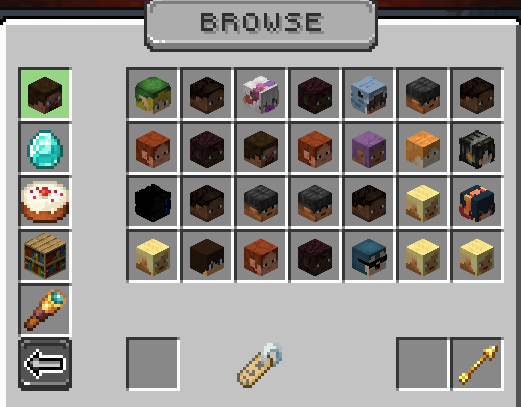
¶ Party Browser
There is a small magnifying glass icon at the top right of the Party Manager interface that will take you to a separate browser interface when clicked. This interface lists and displays information about all current parties in Survival, including their names, levels, likes, visits and owners. You can also click on a party in this interface to teleport to it.
Fortunately, this interface features a variety of filters you can choose from to make the browsing experience smoother and more engaging, and they are as follows:
- Players Online
 Highest Level
 Most Liked
 Friends & Favourites
 Recent Parties (recently visited)
¶ Secondary Features
Secondary Features are party features that will be used throughout your gameplay but aren't directly found on the Party Manager interface. Instead, they are mainly accessed and used by running specific commands.
¶ Party Bans List
When you ban someone from your party with /p ban <username>, they will no longer be able to enter its territory. To view a list of all players who are currently banned from your party, use /p bans. The "Bans" interface will give you information about each ban, including who issued it and when.
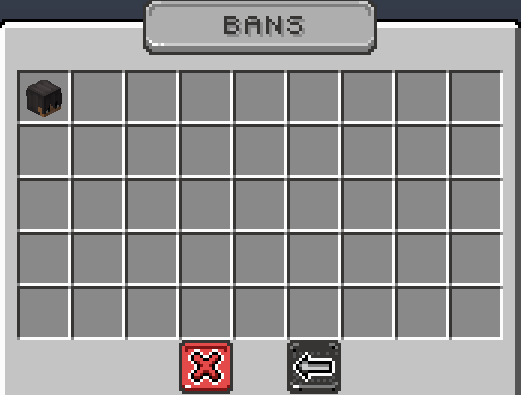
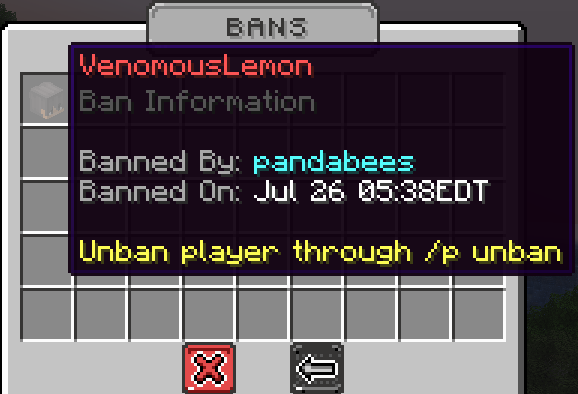
NOTE: Use
/p unban <username>to unban a player from your party.
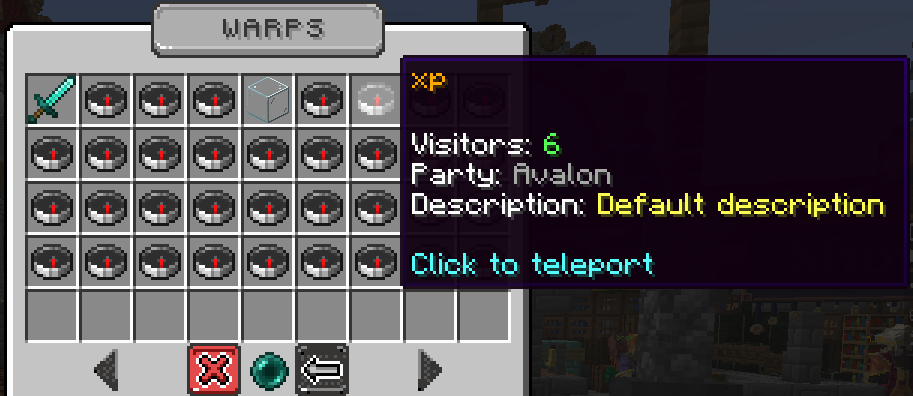
¶ Party Warps List
Whenever you create a warp with /p setwarp <warp name>, it will be displayed for everyone in the "Warps" interface. This interface, accessed through the /p warps command, lists all warps in Survival.
You might notice that the warps in this interface have different icons to represent them. This is done by adding an item identifier at the end of the /p setwarp <warp name> command. For example, if I want my warp's icon to be an iron ingot, I would type /p setwarp <warp name> iron_ingot.
Hovering over one of the icons will provide you with information about the warp and the party that owns it, including the name of the warp, the party's name and description, and how many players have visited it. Furthermore, clicking an icon will initiate a teleport to the warp.
From mob grinder warps to art galleries, shops, builds and dedicated McMMO skill farms, there are numerous options to explore and choose from.
TIP: You can use
/p warps <party name>to see all the warps a specific party owns.
¶ Party Bank
The Party Bank (/p bank) is a shared pool of money for your party members. Given they have the necessary permissions, party members can deposit or withdraw money from the bank.
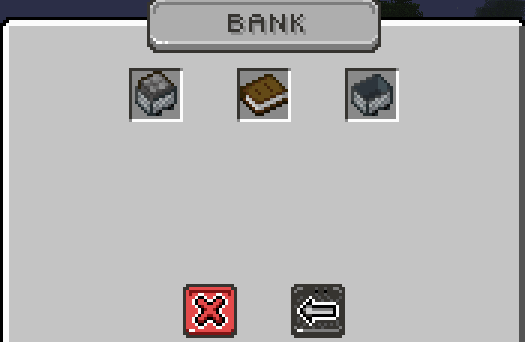
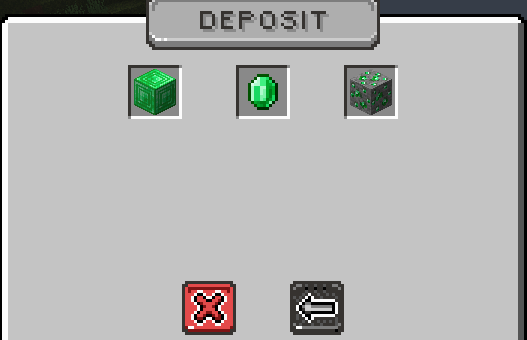
In this interface, clicking on “Deposit” provides three options: depositing your entire balance, depositing half of your total balance, or depositing a specific amount of money into the bank. This can also be done using the command /p bank deposit <amount of money>.
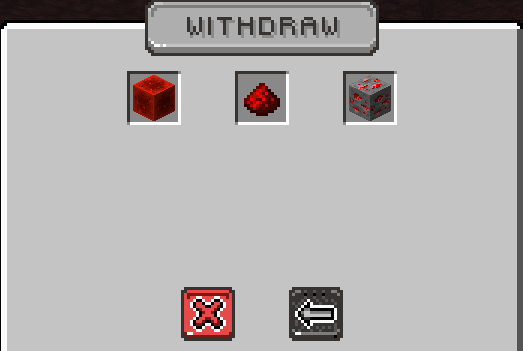
Clicking on “Withdraw” also provides three options: withdrawing your entire balance, withdrawing half of your total balance, or withdrawing a specific amount of money from the bank. This can also be done using the command /p bank withdraw <amount of money>.
NOTE: Hovering over the book in the middle of the "Bank" interface will display information on the Party Bank's recent transactions.
¶ Party Vault
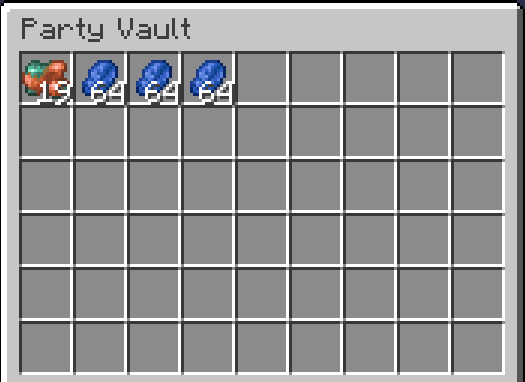
The Party Vault is a shared 54-slot vault accessible to all party members using the /p vault command. It is ideal for transferring items between party members or for storing items that everyone in the party can access and use.
¶ Party Logs
As mentioned above in the Party Settings section of this article, you can use the /p logs command to view your party's activity logs. This command provides a detailed record of all recent activities within your party. The logs include actions such as members joining or leaving the party, changes to permissions, creation and deletion of warps, bank withdrawals and deposits, and party invites sent to other players, among others. Each log entry is timestamped, showing the exact date and time of the activity, making it easy to track and manage your party's history.
For example, you might see entries like:
- "Jul 20 23:49:50 EDT pandabees set BUILD from ALLOW to DENY for MEMBER."
- "Jul 20 23:47:12 EDT pandabees kicked Panduuuu."
- "Jul 20 23:36:37 EDT pandabees created warp panda."
This feature serves as a way for you to monitor your members' activities, helping maintain transparency and accountability within the party.
¶ Collections
The Collection feature tracks a variety of activities for both your party as a whole and for you individually. Whenever you or your party members engage in activities like killing mobs, harvesting crops, mining blocks, chopping down trees or slaying custom monsters, it contributes to the following Collections:
 Mob Collection
 Farming Collection
 Mining Collection
 Woodcutting Collection
- Loot Collection (individual)
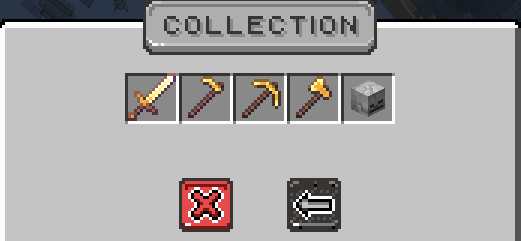
You can view your individual and party Collections with /collection. After selecting either and choosing a Collection to view, you will be presented with a browser interface. This interface allows you to hover over relevant items and mobs with your cursor to see their specific statistics and rankings in your Collection. Moreover, you can click on each item and mob to view their all-time leaderboards across the realm.
